Inking Preparation
Step One: Basic Photoshop
Hopefully this tutorial will give you a basic idea on how to make the most of an inked drawing when computer coloring it.
We will be taking a freshly scanned image and cleaning it up, and then I’ll show you two different methods on getting the image ready for colouring.
This was done on Photoshop 7.0, but should be backwards compatible to at least version 4.0.
Starting with a good, cleaned inked image is key. I achieve this with a light desk. You can get a cheap one for around thirty bucks at Michael's. Also, invest in some good inking pens. I prefer Microns, as they come in several different sizes and are very convenient.
 |
First, I tape a clean sheet of paper onto the top of the sketch to make sure the paper doesn't slip. (I'd use a peg bar, but I like to turn the picture in all directions while I’m inking.) Remember to move your whole arm, not just your wrist while inking, unless you're doing tiny areas. It takes a while to get the hang of it, but it works.
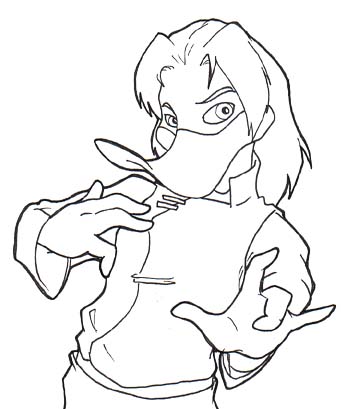
The end scanned result is Mithryn here.
Scan your image in at 150 bpi. You can either scan your line art in as a color image, or in greyscale, however, if you choose the latter method, make sure your lines are really clean.
When you open the image in Photoshop, you'll have to convert it to either RGB or CMYK before you start coloring.
He looks almost good enough to start coloring right now, but he can look a little better. |
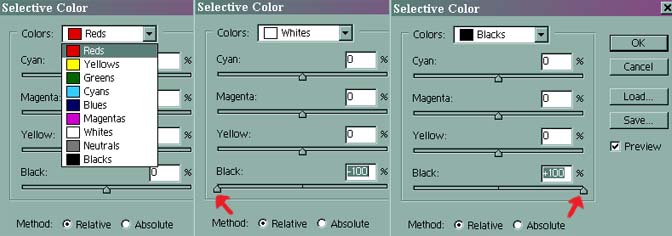
Next, go Image>Adjustments>Selective Color. This will bring up the box shown above.
First select 'White' from the drop down box, and then move the arrow on the bottom bar all of the way to the left.
Now, select Black from drop down menu and move the bar on the bottom all the way to the right.
Note:‘Adjustments’ is known as ‘Adjust’ in version below 7.0.
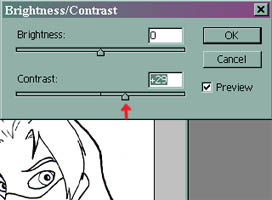 |
Next, go Image>Adjustments>Brightness/Contrast. Move the contrast arrow over to the right, but not too much! I usually stop around 30.
Below you'll find an example of what happens when you put too much contrast into your image |
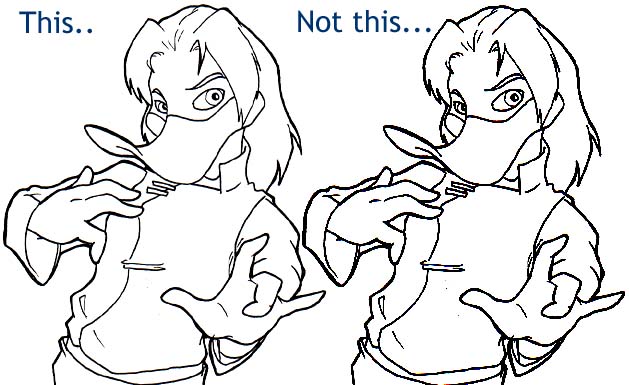
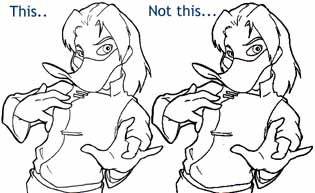 |
With the thumbnail, you might think that the one on the right looks okay. Think again. Click the picture and you'll see how bad it looks.
Unless you plan on shrinking your picture down *really* small, this makes a very big difference in your final image. |
Now that your inked image is ready, you can start colouring, right? Not quite yet. You need to decide whether you want to keep your black lines, or if you want coloured lines.
Back to Tutorials