Part Two: Applying the Filter and Creating a New Object
At this point your image should have a "double" mask--one around the image itself, and one around the area you'll create a thumbnail from. You're now ready to apply an effect.
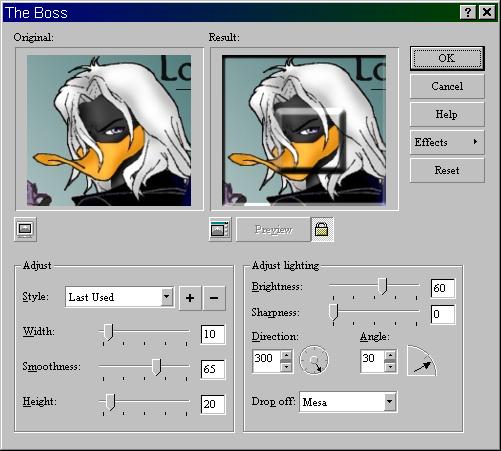
1. Click Effects>3D Effects>The Boss. You'll get a dialog box like this (you can minimize it so you don't get the preview windows, but they help):
Change the settings to match the ones shown. If you want, you can do like me and save these settings as a Style (I call it "Mine") by clicking the + button next to the Style menu and entering a name.
Click OK.
2. Click Mask>Invert.
The next part is a bit tricky. Remember that new image you created at the beginning--the white square? You're going to want it now. Minimize your active image window so that you can see BOTH the white square and the image you're working on, like so:
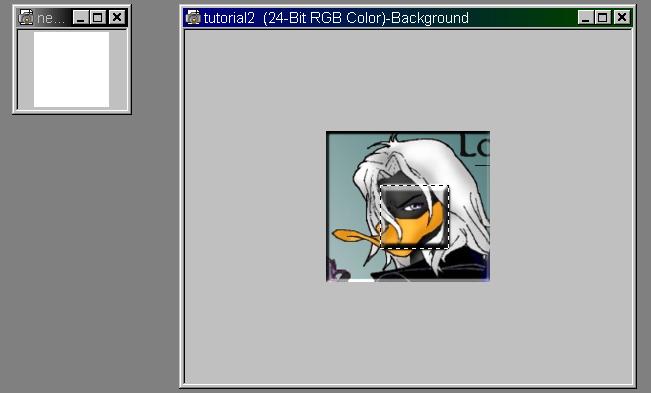
Go back to your active image window. (Keep it small though.) Click Object>Create>Object: Copy Selection. This will create anchors--the eight black squares again--around the area that you just applied the Boss effect to. Click within this anchored area and DRAG it into your new white-square document, positioning it at the upper left corner.
You'll have something like this:

Now, you can close your previous image window (you don't need it anymore) and concentrate on the new one, where you're about to apply another effect.