Click ĹOkayĹ. That will make the file a smaller, faster loading .gif, but still keep a lot of it's quality.
Ever wonder on how to make a cool logo of your very own? Well, wonder no more. Here are some quick and simple exercises that are fun and will get you on the path to creating a few neat effects of your own.
You'll be surprised at the cool and unusual things you can do with Layer effects with little or no effort! All of the effects, including the ones weĺll be using in this tutorial, can be found under Layers>Effects. Letĺs get started!
|
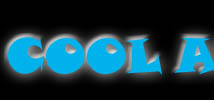
Here you see the ĹOuter Glowĺ text effect and the ĹBevel and Embossĺ effect being used together. It usually looks better than this, but I saved this for faster loading instead of looks.
But you will want to go Image>Adjust>Mode>IndexedColor, and then Image>Export>GIF89a export.
Click ĹOkayĹ. That will make the file a smaller, faster loading .gif, but still keep a lot of it's quality. |
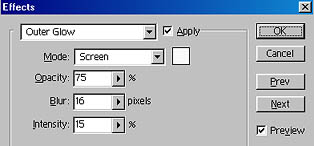 |
This is the ĹOuter Glowĺ effect box.
ĹOpacityĺ is how visible your outer glow effect will be. ĹBlurĺ is how much glow there is. ĹIntensityĺ is how dark the outer glow colour is. Feel free to play around with the settings. If you have the ĹPreviewĺ box checked, you can see what youĹre doing to your image, and if you donĺt like what you see, just hit ĹCancelĺ. |
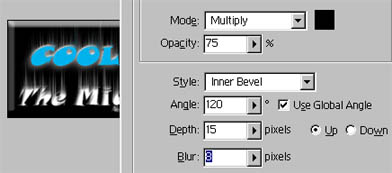 |
If you want your text as a button or banner, then youĺll want to do this. Flatten your entire image, then go Layer>Duplicate Layer. Then go Layer>Effects>Bevel and Emboss. Choose ĹInner Bevelĺ and apply. Flatten your image again and save. |
Now this fun technique can be used with a lot more then just text. You can also use this to add depth to your backgrounds, create cool effects, and numerous other things.
 |
Now, instead of selecting the entire image, weĺre going to make a box around the text with the Rectangle selector. Go Edit>Tansform>Perspective. Doing this will put little boxes on the corners.
Click and hold one of the upper corners and pull it into the picture. Then grab one of the lower corners and pull it out away from the picture. That will make the top of the text smaller, and the bottom larger, and the whole image looking like itĺs coming towards you. Once you have your image that way you want it, click on the tool bar to the left and click ĹApplyĺ. |
 |
Hereĺs what it looks like on both sides. This is quite an extreme change, considering the ĹCool as Iceĺ text was originally twice the size as the white text!
Note: Transform>Distort and Aceware are also very helpful. If your whole image is selected, ĹRotateĺ will allow you to spin your image and place your text where ever you want it. |