I also like using characters that are kneeling, sitting or lying down, instead of standing up, because for reflection effects, we have to double the image size.
Step One: Making a Mirror Image
|
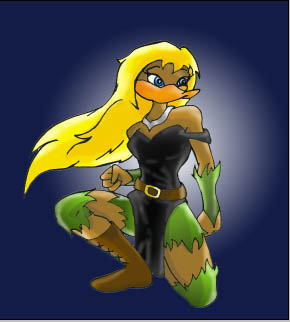
For this type of effect, it’s best to put your image against a dark background.
I also like using characters that are kneeling, sitting or lying down, instead of standing up, because for reflection effects, we have to double the image size. |
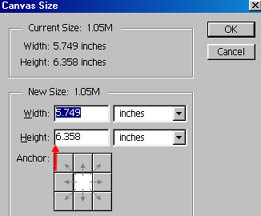 |
Go Image>Canvas Size. And where the red arrow is pointing in the example is the height of your picture.
You will want to double or perhaps even triple this number. You can always crop it down later. |
 |
Use the Rectangle Selector to select the bottom area. Gradient fill it with two shades of blue, the lighter one ending up at the bottom of the image. |
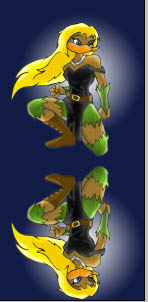 |
Use the Rectangle Selector again and copy the top half of your image. Paste it back onto the bottom half of your image and go Edit>Transform>Flip Vertical.
The bottom half should now be upside down. Use the ‘Move Tool’ to adjust the bottom half until it's situated like in the example shown |
 |
Making sure the bottom half is still selected, go down to ‘Layers' control box. Where the red circle in the example is your opacity. Set it to around 50 percent. |
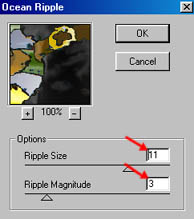 |
There are two ways you can add ripple effects to the bottom half of your image. One is Filter>Distort>Shear . The other is Filter>Distort>OceanRipple and this is what I used. The red arrows in the example are the settings I use for a mild ripple effect.
Flatten your image. Congratulations, you’re done! |
Click here to see the end result!