
"Rekka": Japanese for "Fire" or "Wildfire."
For practice, try doing your first Flaming Text FX with a window that's 400 x 134 pixels. It's just easier to manipulate while you get the hang of things.
It’s very important that you start off with white text and a black background! This is for giving it fire-coloring later on.
Also make sure to put your text at the bottom of the image!
"Rekka": Japanese for "Fire" or "Wildfire." |
The bolder the text, the better! I prefer Arial Bold 60 pt. for doing most text FX that require a thick font. |
 |
First flatten your image, then go Image>Rotate Canvas>90° CCW. Next, go Image>Adjust>Invert. |  |
Now for the fun stuff! Go Filter>Stylize>Wind>Wind (from left). |
 |
Invert the colors again, then do Filter>Stylize>Wind>Wind (from left) twice or as many times as you want. See how they get nice and long?
Next, rotate the canvas 90° CW. |
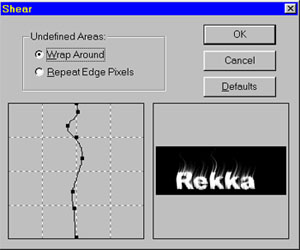 |
Go Filter>Distort>Shear. Now give your flames all the curling and fire-action you want!
The box on the left is what I used for the example text. |
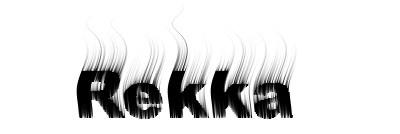 |
Invert the image once more and then go Image>Mode>Indexed Color. Go with the Default settings, unless you’re feeling adventurous.
This is how your image should look before coloring. |
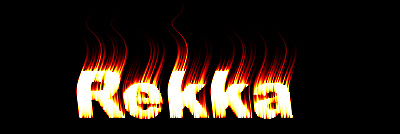 |
The final step is Image>Mode>Color Table. Select 'Black Body'.
You're done! |